
Recently, I started streaming SQL Friday directly to YouTube. The speaker still connect to a Teams meeting and then I use OBS Studio to create scenes with components from the Teams call together with a Title bar etc, and stream from OBS Studio directly to YouTube.
Since I struggled a little bit with getting all the bits and pieces right (and perhaps I still have some tuning to do), I wanted to write this blog post, in case anyone search for a way to do the same.
First – setup NDI for your Teams computer
NDI, short for Network Device Interface, is a broadcasting technology that broadcasts streams from cameras and other devices to the local network. Teams has built-in capabilities for NDI broadcasts, but you will need some NDI drivers. These drivers can be downloaded from https://ndi.video/download-ndi-sdk/. Downloading the NDI SDK should be enough. You will need this software on the computer where you run your Teams client as well as on the computer where you run OBS Studio. In my case, it’s the same computer, but you may just as well connect to Teams from your laptop, and use OBS on a seperate production computer.
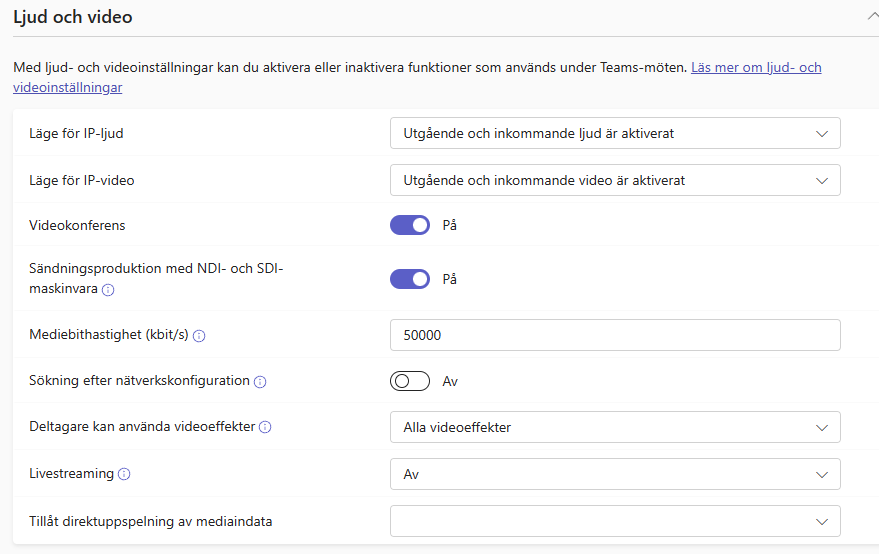
Once you have installed the SDK, you need to configure your Teams user, to allow it to broadcast with NDI. This is done in the Teams Admin portal, by changing existing or creating new meeting policy and assign it to the users who should be allowed to use NDI broadcast.
Next step is to configure the Teams client.
SO FAR, NEW TEAMS CLIENT HAS VERY LIMITED SUPPORT FOR NDI BROADCASTS
So I stick to the classic/old Teams client. There, you enable NDI for yourself by clicking the three-dot-menu next to your profile picture, and select Settings. Under settings, you go to the App Permissions tab, and there you should find this setting.

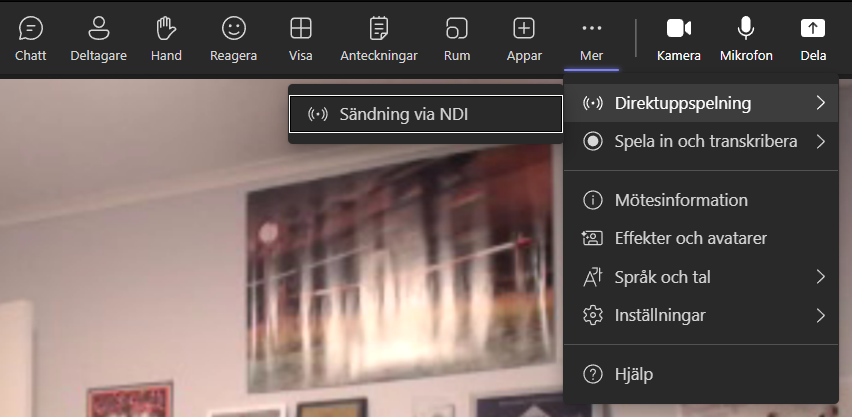
Now you’re almost done with the NDI setup in Teams. Last step is to start broadcasting when you’re in a meeting. So start the meeting, select “… More” and enable Broadcast via NDI under the Broadcast menu (above the recording menu). If you don’t see it, make sure your Teams admin have enabled NDI and that you yourself have enabled NDI for yourself in Teams.
Next up – configure NDI in your OBS Studio computer
For the computer where you run OBS Studio, you also need to install the NDI SDK (see the previous section). I went for the full Tools-suite, but that’s not really necessary. If you run OBS Studio on the same computer as Teams, you’re all done.
Once we have the NDI-SDK in our OBS Studio computer, we need to install the NDI-Plugin for OBS Studio. You can do that from the OBS Project Plugins forum.
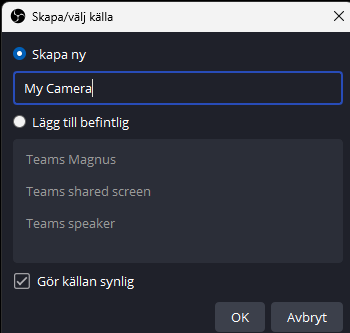
Now we’re ready to start configuring our NDI sources. The easiest way to do it is to start a Teams call with someone, start the NDI broadcast in Teams and then go into OBS Studio to create a scene.
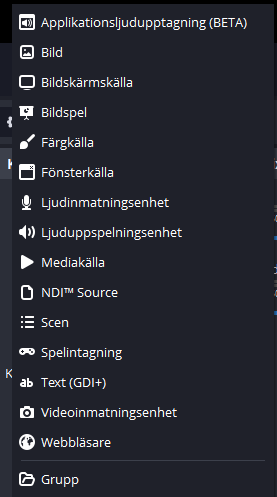
In your OBS Studio Scene, click the Plus sign to add a new source. This will bring up this menu:
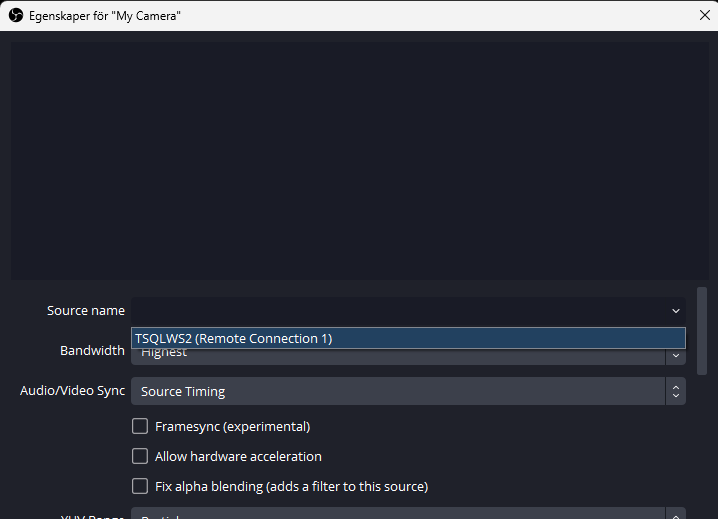
One thing I realised late into the game is the Audio Video sync settings of an NDI source. The default is “Source Timing”. Change it to “Network” and you will most probably notice a remarkable improvement in audio quality from your Teams call. Also the sync itself actually works. If you get this wrong, chances are your stream from OBS Studio will get the audio sources mistimed, which makes for a quite funny way to follow conversations between two parties…

For the rest, it’s going to come down to your creativity in setting up the scenes in OBS Studio. I will leave that up to you.
Lastly – stream to YouTube
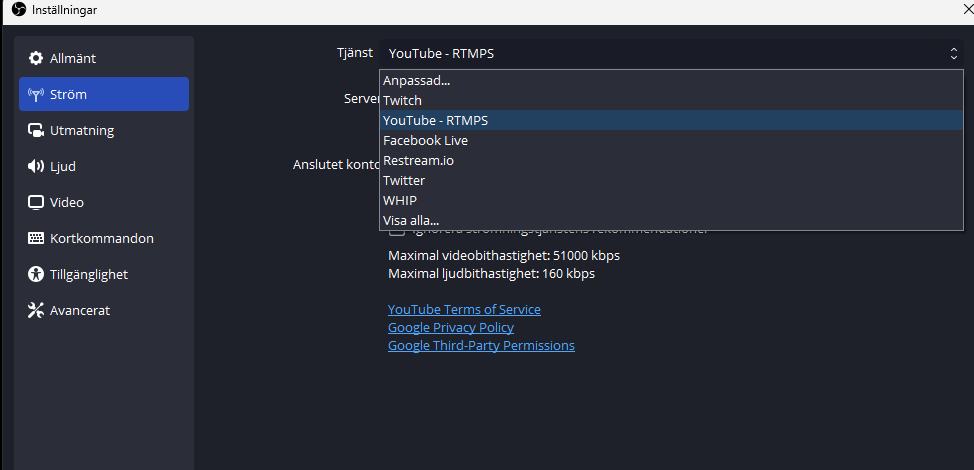
To stream to YouTube, you need a YouTube channel. If you already have that, you’re basically good to go. In OBS Studio, choose the stream settings over here.
So start by opening “Settings” and configure your Sterams.
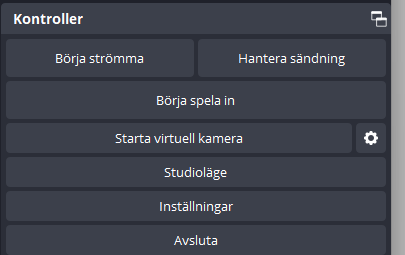
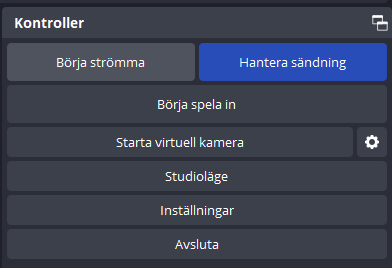
With your YouTube account connected, you choose to manage streams in the lower right-hand corner of OBS Studio.
Now you can either create a new Live-stream, or select an existing one from your connected YouTube account. The settings if you choose to create a new Live Stream are pretty much the same you will find in YouTube Studio, so I’m not going to explain them in detail. Once you’re done selecting or creating your Live Stream and select it, you’re ready to start streaming.
DONE! Or maybe not
I’m sure you, as I, will run into some technical difficulties with NDI/OBS Studio/YouTube. You can see my results, and how they evolve over time on my YouTube-channel. SQL Friday Season 8 is the first playlist where I started live streaming the event. (1) SQL Friday Season 8 – YouTube
Good luck! Let me know if I made any obvious mistakes in this post, and also let me know about your progress.
Personally, I feel like I live in the feature. Live streaming to a global audience, from my own office room. Wow.